How to Issue e-Invoices from Zoho Books Using Bigin by Zoho CRM
Overview
This Article is aimed at Zoho Books clients who are using Bigin by Zoho CRM to streamline your sales and accounting processes. If this is the first time you're hearing about Bigin, welcome! With e-invoicing placing a higher demand on customer relationship tracking, having a dedicated CRM has moved from the 'nice to have' to a 'must have' for Malaysian Startups and SMEs. That's where Bigin comes in. While Bigin by Zoho CRM helps you manage customer relationships and sales pipelines, Zoho Books handles your invoicing and financial tracking. With the integration between these two apps, you can use customer and deal data from Bigin to create and issue invoices in Zoho Books efficiently. This article explains how to set this up and issue invoices step-by-step.
Who Can Use This Feature?
- Users with a paid Bigin by Zoho CRM plan (or Zoho One subscription) and an active Zoho Books account.
- Admins who can configure integrations in both apps.
Prerequisites
Before you begin:
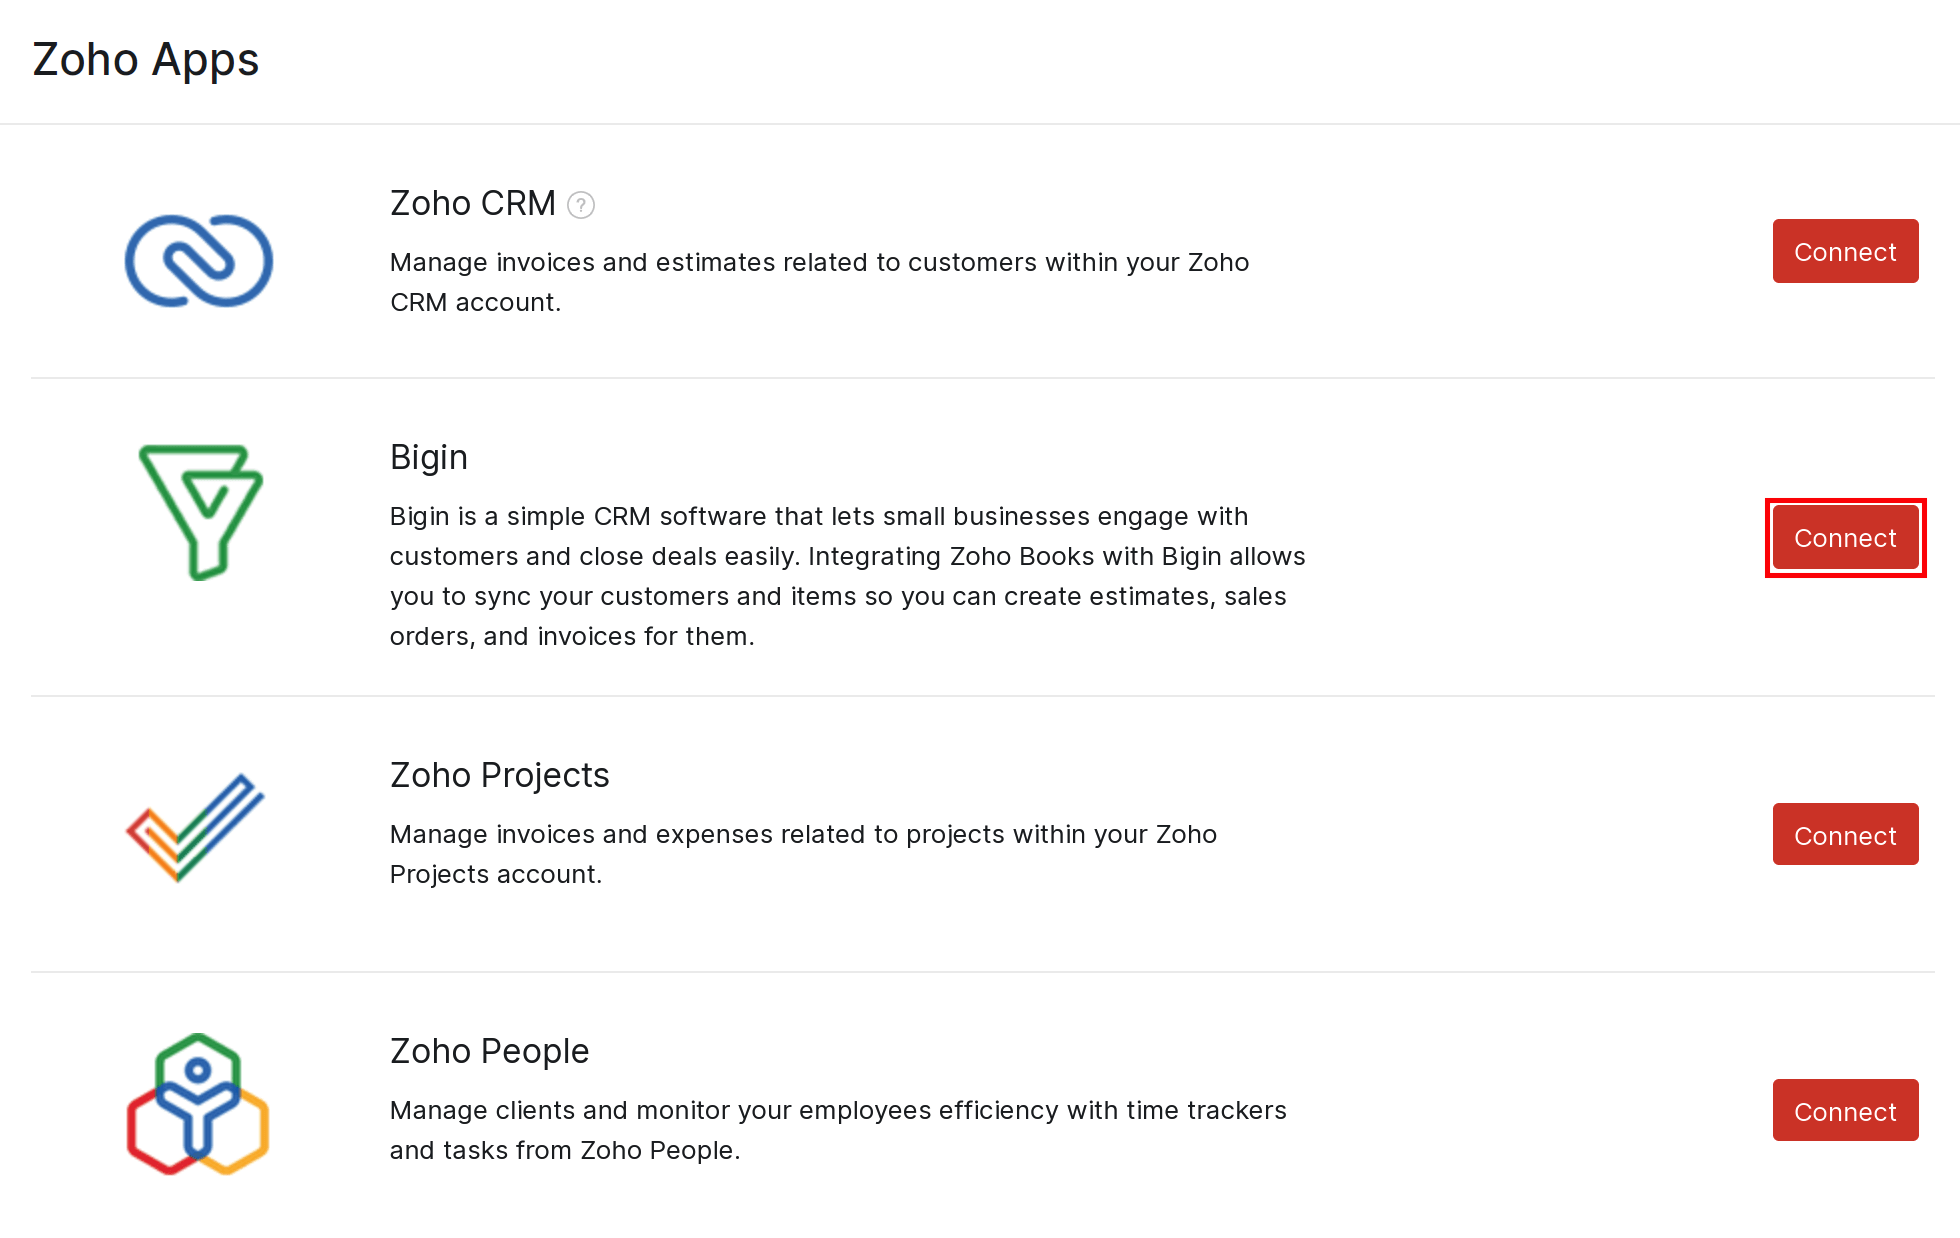
- Ensure the Zoho Books- Bigin by Zoho CRM integration is active. (Need help? See How to Integrate Zoho Books with Bigin.)
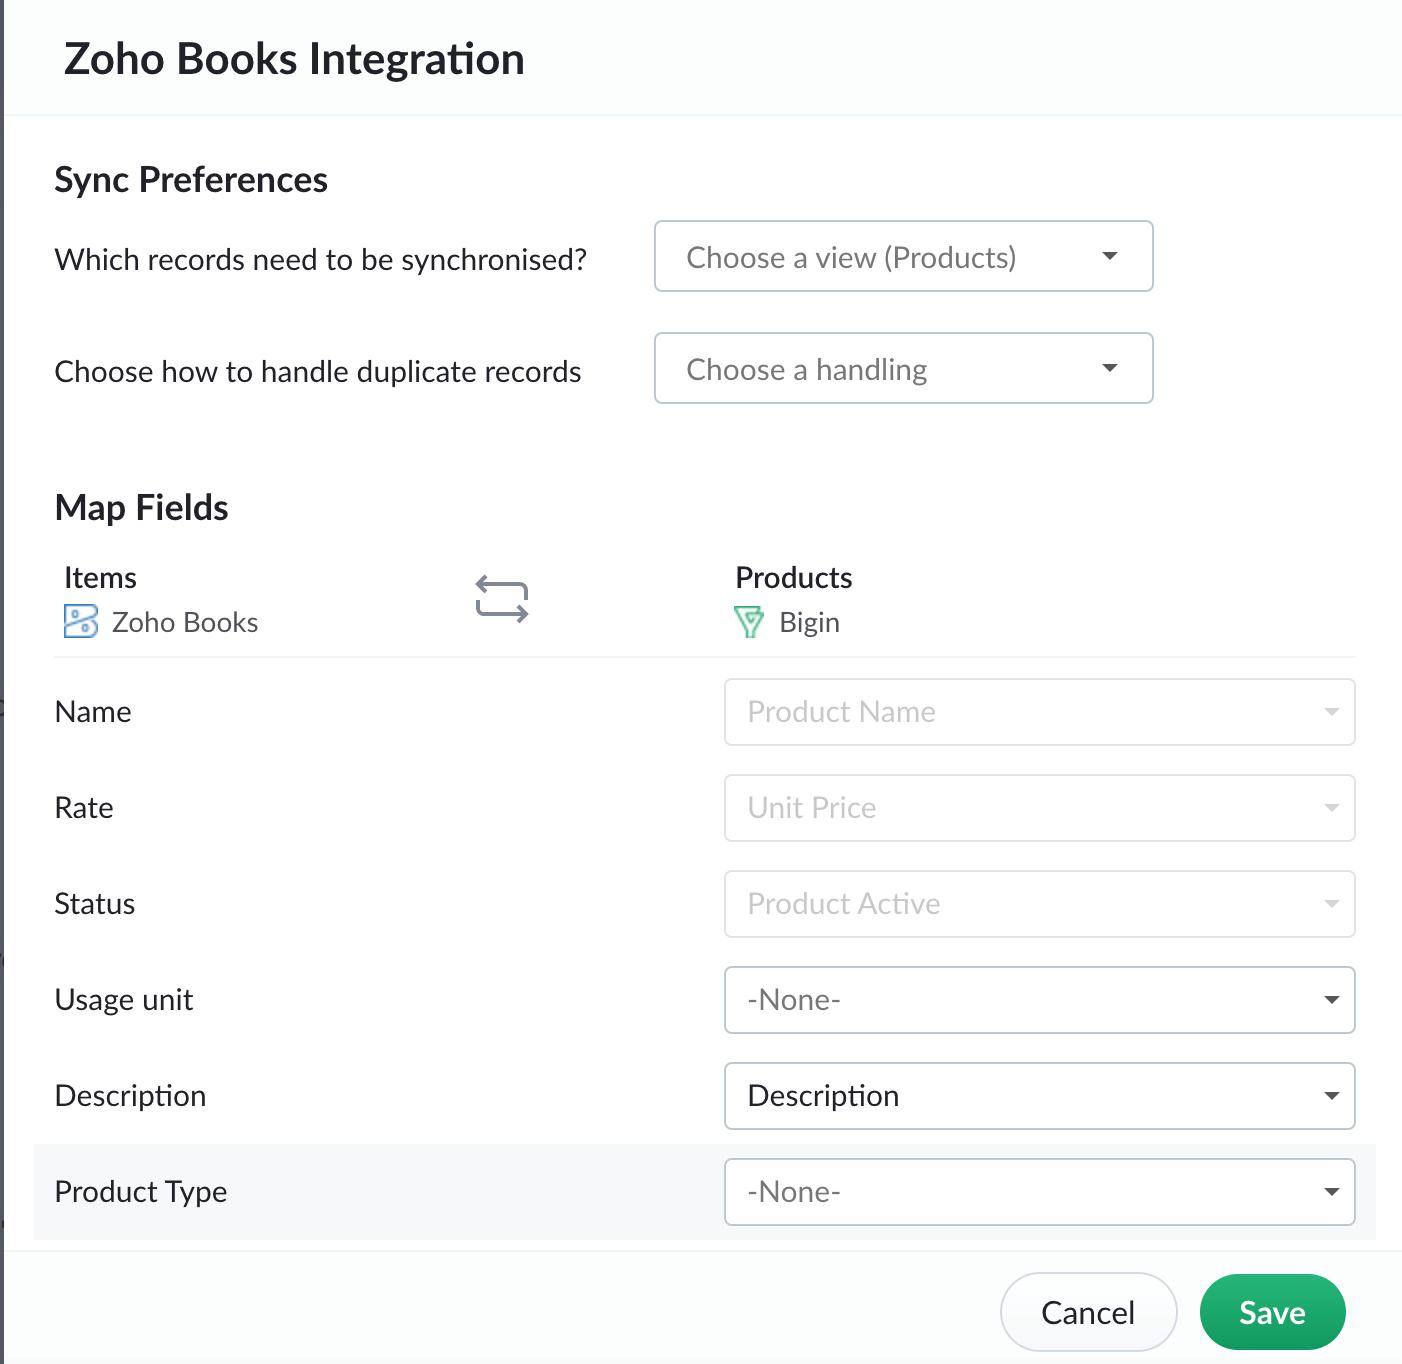
- Sync your Bigin contacts, companies, and products with Zoho Books.
 You need to have admin access to both Zoho Books and Bigin by Zoho CRM to set up and manage the integration.
Steps to Issue Invoices
Step 1: Sync Customer Data from Bigin to Zoho Books
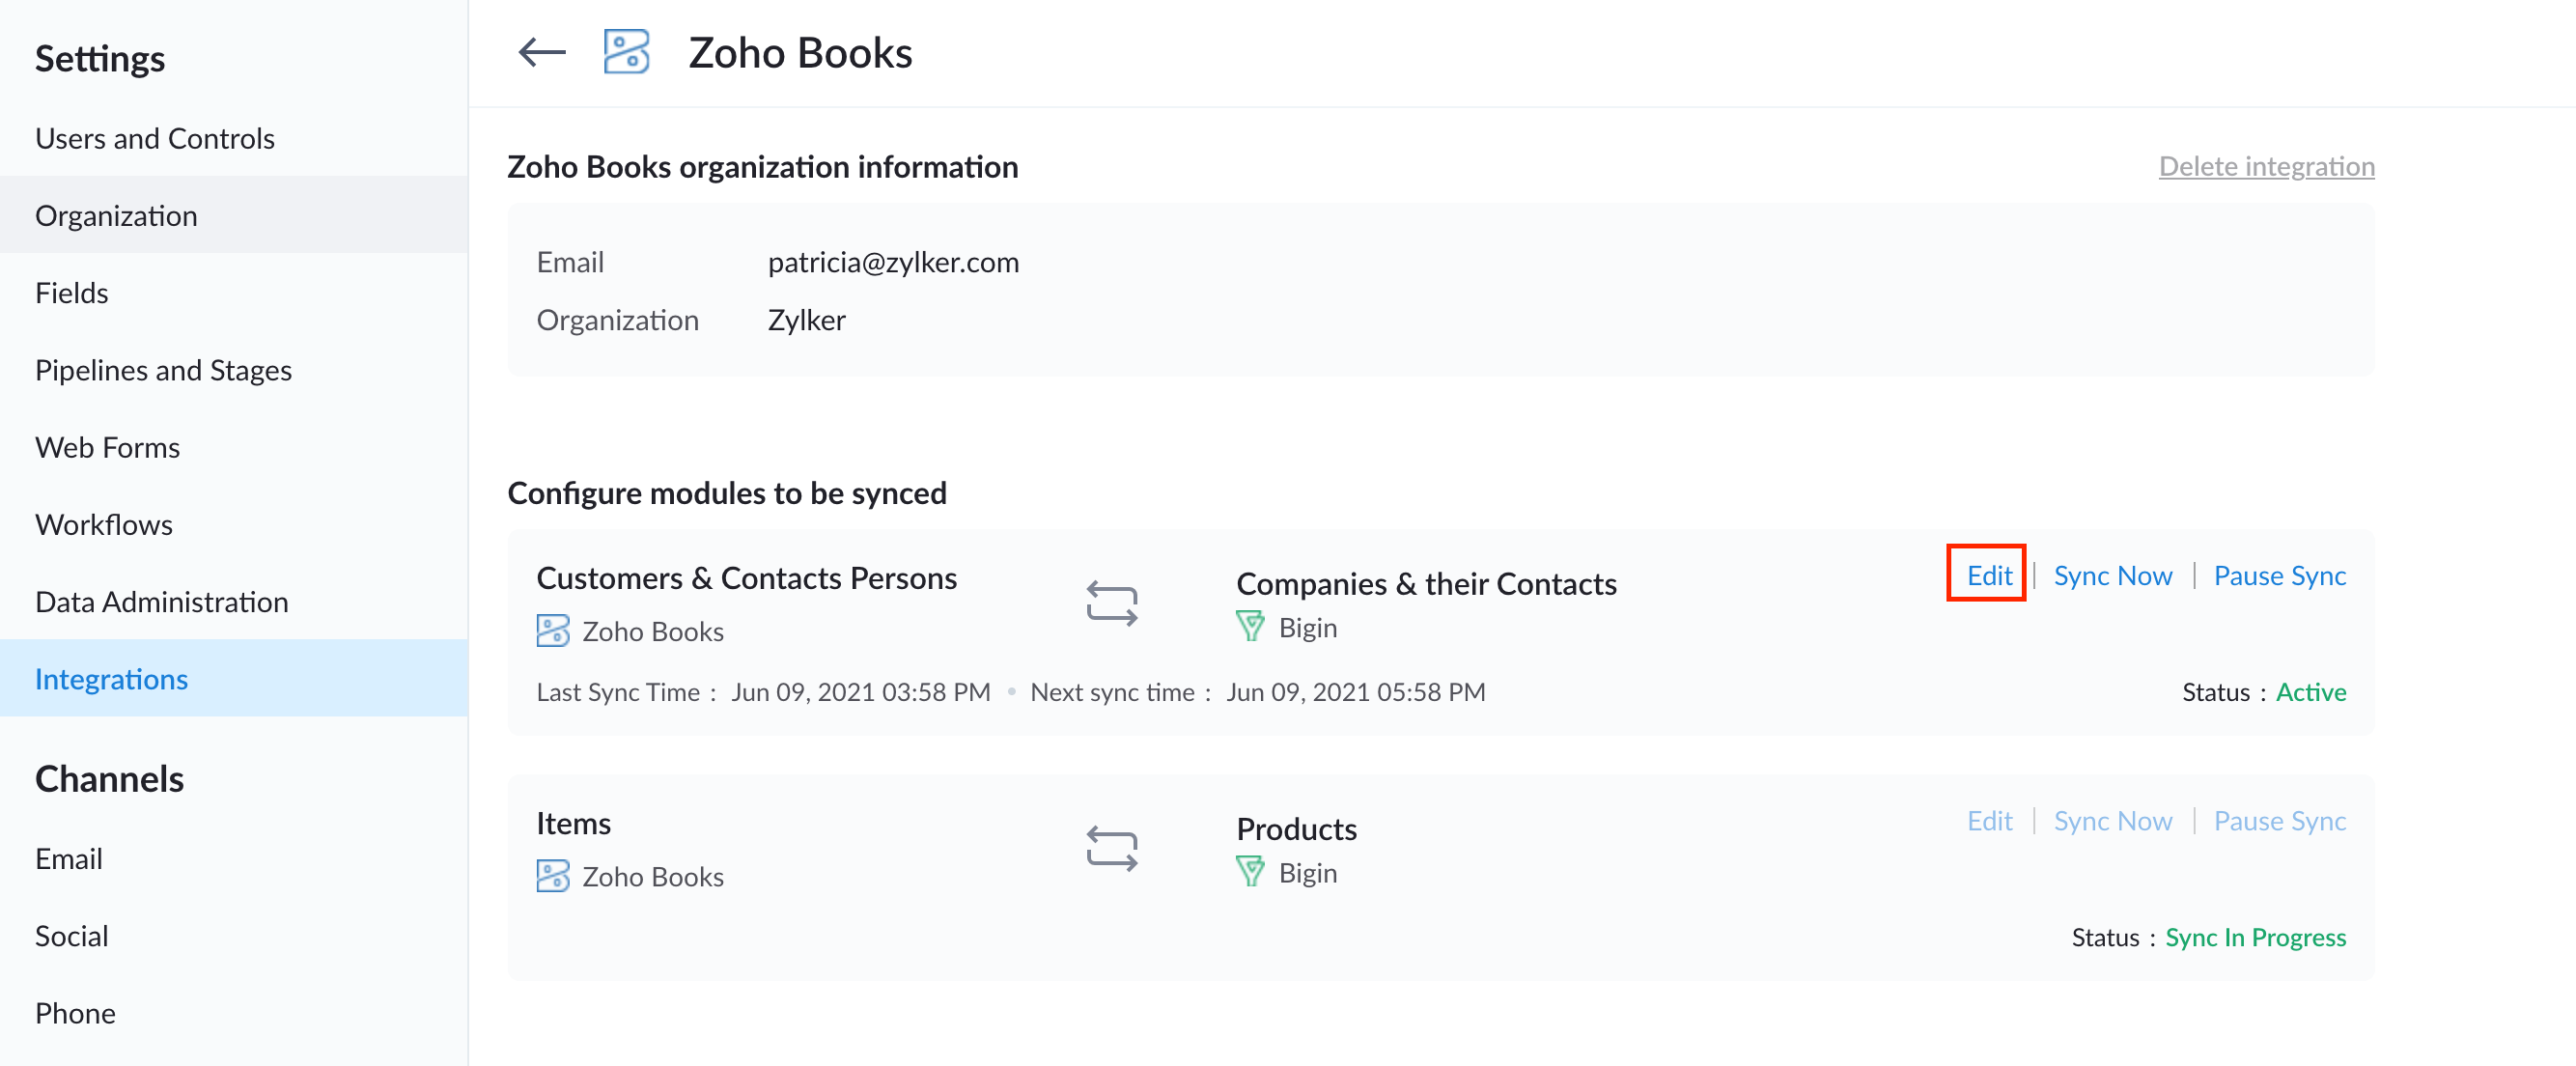
- In Bigin, go to Settings > Integrations > Zoho Books.
- Verify the integration is active and configure sync settings:
- Contacts and companies in Bigin sync as customers in Zoho Books.
- Products in Bigin sync as items in Zoho Books.
- Check Zoho Books under Customers to see your synced Bigin contacts and companies.
 Tip: If a customer isn’t appearing, ensure the sync is complete or manually trigger it from the integration settings.
Step 2: Link a Deal to an Invoice
- In Bigin, manage your sales pipeline and mark a deal (potential) as "Won" when ready for invoicing.
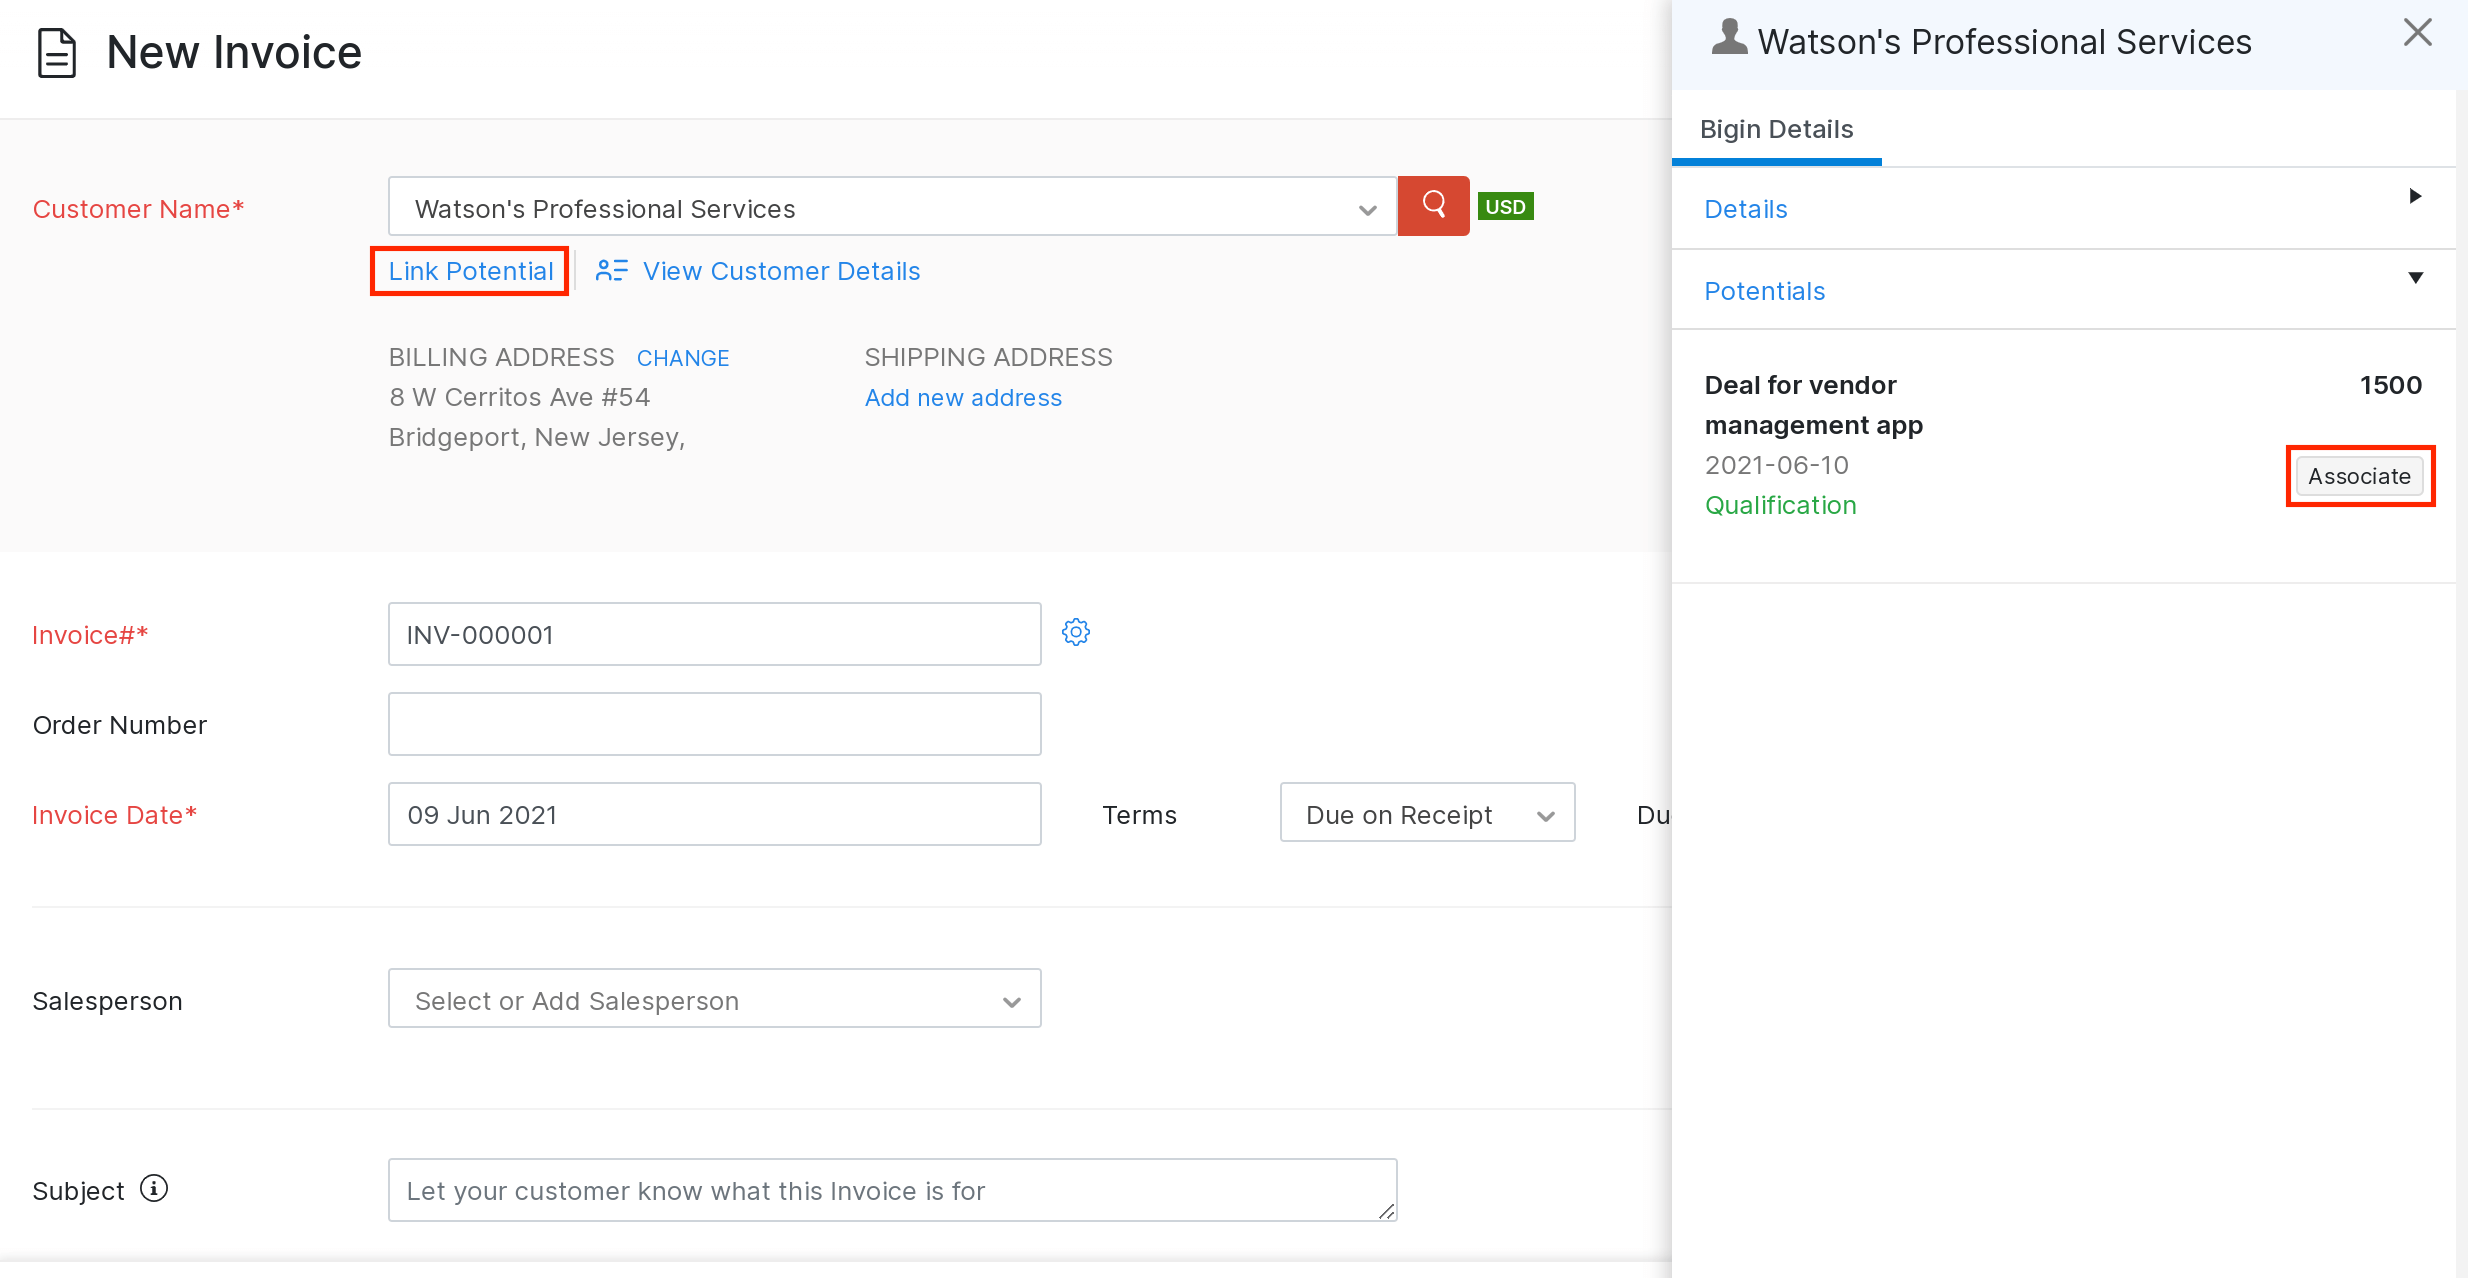
- Switch to Zoho Books and go to Sales > Invoices > New Invoice.
- Select the synced customer from the dropdown (e.g., a company or contact from Bigin).
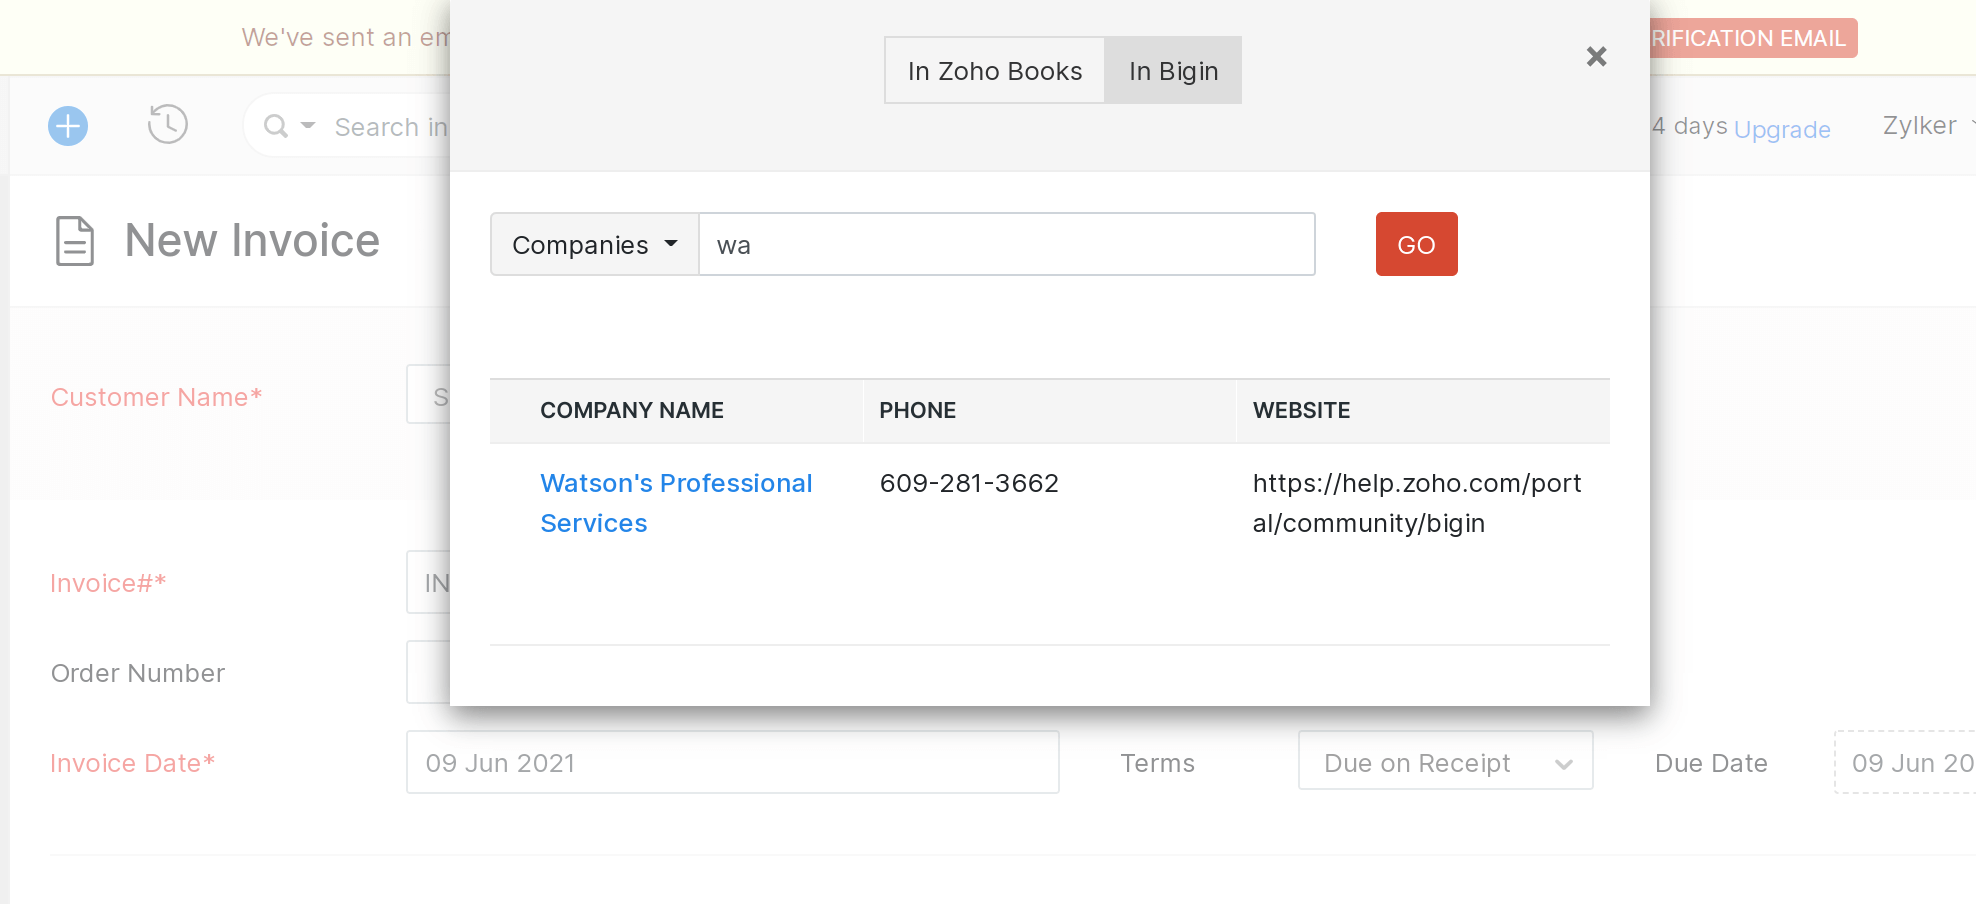
- Use the Bigin Sidebar (if enabled) to link the invoice to a specific potential from Bigin. This connects your sales deal to the financial transaction.
Step 3: Create and Send the Invoice
How to Submit an Invoice to LHDN
Complete the invoice details and save the document.
Press Push to MyInvois to validate the TIN and receive a QR code.
Note: Ensure the invoice is approved before pushing it to the MyInvois portal.
Example Workflow
- Scenario: You close a RM500 deal for "ABC Corp" in Bigin.
- Action: In Zoho Books, create a new invoice, select "ABC Corp" (synced from Bigin), link it to the deal, add a RM500 item, and send the invoice.
- Result: The finance team tracks payment in Books, while the sales team updates the pipeline in Bigin.
 Important Notes
- Direct Invoicing: You cannot create invoices directly in Bigin. The integration syncs data to Zoho Books, where invoicing happens.
- Automation: For automatic invoice creation (e.g., when a deal is won), use Zoho Flow or Zapier. Contact us in the webchat to ask about setup assistance!
- Data Consistency: Changes to synced data (e.g., customer details) reflect in both apps, ensuring accuracy.
Troubleshooting
- Customer not syncing? Check the integration status in Bigin (Settings > Integrations) and ensure field mappings are correct.
- Bigin Sidebar missing? Confirm the integration is enabled in Zoho Books (Settings > Integrations > Zoho Apps).
- Still stuck? Contact us in the webchat and we’ll assist you!
Wanna try out Bigin by Zoho CRM? Sign up for a free trial HERE.
Related Articles
Best Practices for Collecting Customer Information for e-Invoicing Compliance
As you implement the e-Invoice Plugin for Zoho Books, it is essential to establish a streamlined process for collecting accurate information from your own customers, vendors, and freelancers. This ensures full compliance with Malaysia’s e-Invoicing ...Automatically Create Zoho Books Invoices When WooCommerce Orders Are Completed
Overview Automating invoice creation can streamline your sales and accounting processes. With Zoho Flow, you can set up a workflow that automatically creates a Zoho Books invoice when an order in WooCommerce is marked as "Completed." This guide walks ...When Must I Issue an e-Invoice in Malaysia Under MyInvois?
Answer: If you're a Malaysian business or taxpayer under LHDN's MyInvois e-Invoice system, you are generally required to issue an e-Invoice for any transaction that has tax implications — whether for income (sales, services) or certain expenses ...Can I Issue a Self-Billed e-Invoice? And What About Consolidated Ones?
Introduction The official reference for industries prohibited from issuing consolidated self-billed e-Invoices is found in the: e-Invoice Specific Guideline (Version 4.1) – Section 3.6.5, Page 19 It states: "Kindly note that consolidation does not ...When Can I Use a General TIN in Malaysia’s MyInvois e-Invoice System?
Answer: General TINs are placeholder Tax Identification Numbers (TINs) issued by LHDN for use in very specific situations — they are not to be used by default. Using them incorrectly may result in rejected e-Invoices or audit issues. Approved General ...